Learn Graphic Designing – Beginners Guide
 |
Internet of things |
In this article, we are going to make use of CANVA1graphic designing software. Using this software you are able to design banners related to various fields and various social media platforms.
Login using CANVA2and select the size "5000 x 3100" which I have used this in my case to get the quality of image more than 5 Megapixels.

On this new interface head-on to the "elements" section plays an important role in our entire article.
The
free features that are present in the elements section allow content creators
to design professional designs by searching for different elements within it.
In
"elements" scroll down and select "shapes" "see
all". In this, there are several elements available that provide various
overlapping shapes.
In this case, I have selected an overlapping square that can also be converted into a rectangle by simple drag and drop.

I
have spread this overlapped rectangle to its full size that matches the box
present on the interface.
I
have changed the color of the overlap size to faint black or gray and the color
of the main part to light gray.

Then
again I select the hollow rectangle from the "elements" and
"shapes" section and spread it across the rectangle section.


I have changed the color of the main small square to dark reddish-gray and the overlap part to dark gray.

Now
to save time I will make duplicate copies of this small overlapped square to a
total of 12 numbers to put them on the hollow rectangle.

Then place all the rectangles in line and in the queue that feature offered by CANVA3helps ease to use interface.
As
per the color of your choice select the type of background color that best
suits your design in my case I am giving a light gray color.
The step can be selected before or after your design gets complete as it depends
upon the appearance of your design.
Once all the small overlapped square are
placed in the position of the rectangle it’s time to put our elements in it. In this, my subject topic is "internet of
things" so I will put all the objects that well explain the importance and
concept of the internet.

Head on to elements again and type for
"internet" and start placing objects like WiFi, computer, mobile,
home, video download, email, search files, etc.
Drag
and drop all the items and place them in the boxes and change the color of the
objects. In this case, I am giving white color that best suits my design.
Now Search for "cloud" and choose the one that allows the option to change the color. CANVA4also offers a number of magic recommendations after selecting a particular item.

In this cloud, I, in this case, putting mobile
with size suiting in that cloud and bulb that I got from magic recommendations.
Now
the design is almost final I am adding a few elements like a plus sign and a bunch of
stars to it for making it look fancy.
Do
not try to add too many extra items otherwise the design may get spoil and
place them at the desired location.
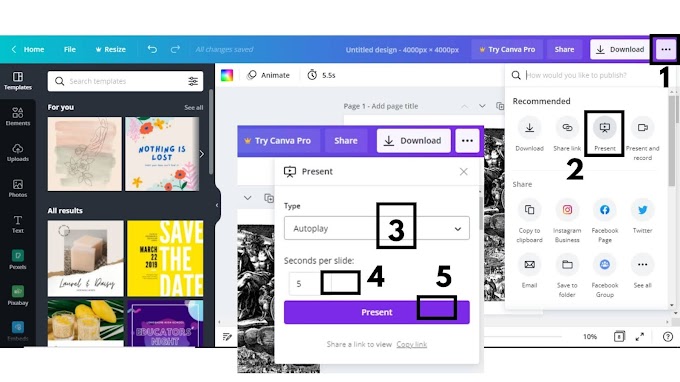
Download
the file in the type of format you want as CANVA offers a number of formats.
Watch a Youtube Video
So the bottom line is
1.
If the subject topic is of "internet
of things" then put the things down that most relate and explain the
concept of the internet.
2.
If you refer CANVA to your audience you get
the premium features and your audience get a few of your features as well.
3.
Use short cuts like Control C & Control
V to save your time, and "Duplicate" if you have used object from
element section.
4.
Try to sell your prepared objects to Shutter stock.
If
you have some other ideas please do let us know them.
Thanks
for having by
With
Best Regards


0 Comments
Please do not enter any spam link in here